
Helsieni Growbag
Get a bigger harvest of mushrooms at home!
Helsieni Growbag is the perfect set to grow mushrooms at home. This is how simple it is: add water, mix the ingredients and let it grow! Growbag is suitable for anyone who wants to grow local food without a hassle. Children can also participate in the preparations and watch the mycelium to grow.
On this page you will find detailed instructions to help you grow mushrooms in Growbag.
Instructions for Growbag step by step

Equipment
☛ Growbag
☛ 1 kg straw pellets comes with the Growbag
☛ Spawn bag comes with the Growbag
☛ Boiling water
☛ Spoon
☛ Scissors or knife
☛ Clothespins, paperclips or tape
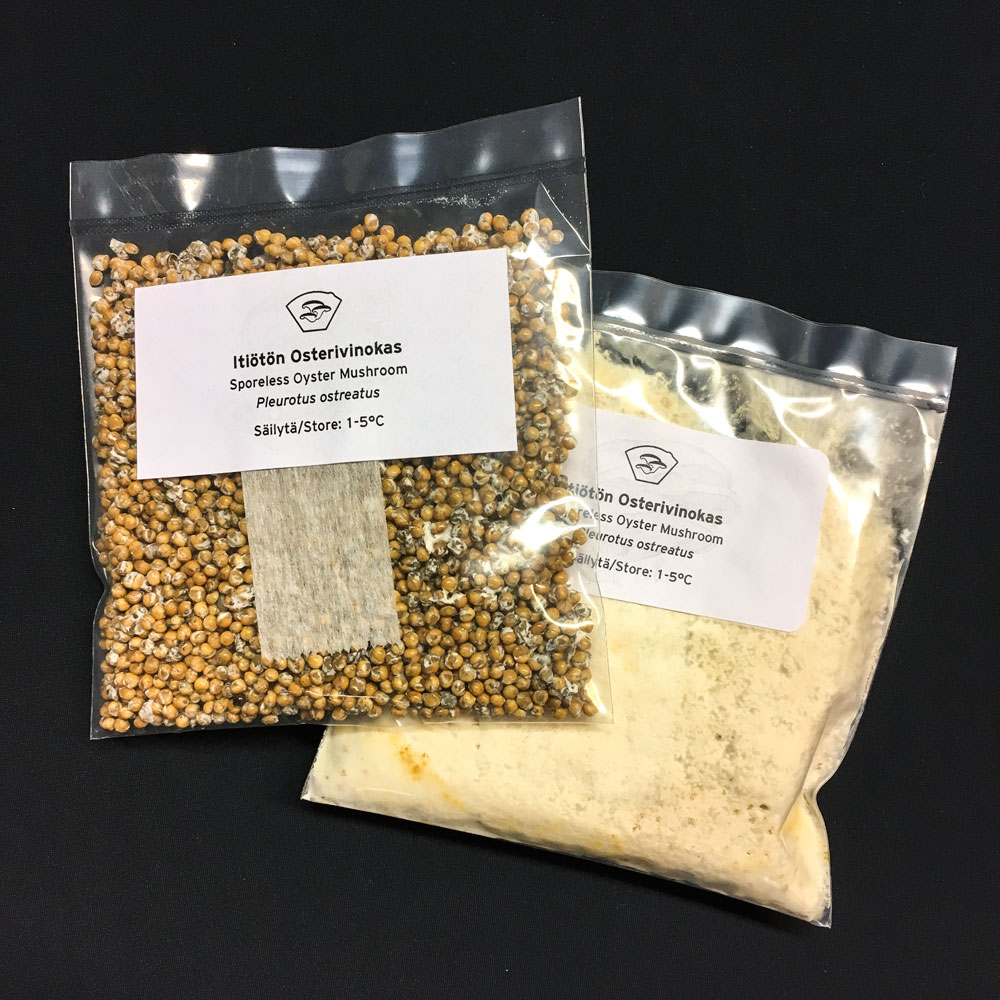
Did you forget the spawn bag in room temperature?
Don’t worry! Even though we recommend you to store the unopened spawn bag in the fridge it usually works fine even after weeks in the room temperature. It’s always worth a try as long as you don’t see any green mold in the bag. The bag can be stored in the fridge for some months.
Healthy living spawn can look like the bags in the photo or almost anything between those two extremes. If the spawn has grown almost solid try to break it in smaller parts before opening the bag.
1
Add boiling water
and let it cool down.
Boil 3 liters of water and pour it on the straw pellets in the Growbag. Make sure all pellets get fully hydrated by for example shaking the bag or mixing the straw with a disinfected spoon. Fold the opening of the bag down to prevent contaminants from entering and allow the straw to cool for 2-3 hours.

2
Mix in the spawn
break the spawn into small crumbles
Squeeze the spawn bag and break up the bigger clumps to make it as loose as possible. Then open the bag with clean scissors and sprinkle the spawn over the straw pellets. Mix with a spoon disinfected with boiling water or hold the opening of the bag tightly closed and shake the bag.

3
Close the bag and wait
keep in 20°C – 24°C for 2.5 weeks
Lift the bag upright, close the bag with a couple of folds, and secure it with paper clips, clothespins or tape. Leave the white filter area free so that air can exchange inside the bag.
The ideal temperature for mycelial growth is 20°C to 24°C. You can keep the bag in the dark at this point. Let the mycelium grow for 2.5 weeks.

4
Cut slits in the bag
and move it to a cool and luminous place.
Within about 2.5 weeks, the mycelium colonises the straw pellets. It may take a couple of days more or less, so keep an eye on the Growbag.
Cut 10-15 cm slits at the front of the bag with a disinfected knife. The slits should be made on the middle of the bag on the solid block of straw and mycelium. You can turn the Growbag upside down and fold the empty part of the bag under the mycelium so that no air is left there. This way the fresh air enters the bag at the slits and encourages the mushrooms to grow out.
If possible, move the Growbag to a cooler 15°C to 18°C and a luminous place – but not in direct sunlight. The more humid environment the better. Room temperature is also suitable if there is no other place available.
Keep the Growbag away from air conditioners, fans and heat sources such as radiators or stoves.

5
Keep moist
for example with a humidity tent.
After cutting the slits, spray water on them.
If there is dry air at your home, create a micro climate, for example with a paper or plastic bag. Spray clean water on the inside of the bag a few times a day and lower the bag as loosely as possible onto the Growbag. It is important that fresh air can enter the bag freely. In addition, you can keep a plate or a bowl with water under the Growbag in addition to the humidity tent.
We recommend using the humidity tent until harvesting to prevent the mushrooms from drying out.
6
Harvest
within a week from when the mushrooms started growing.
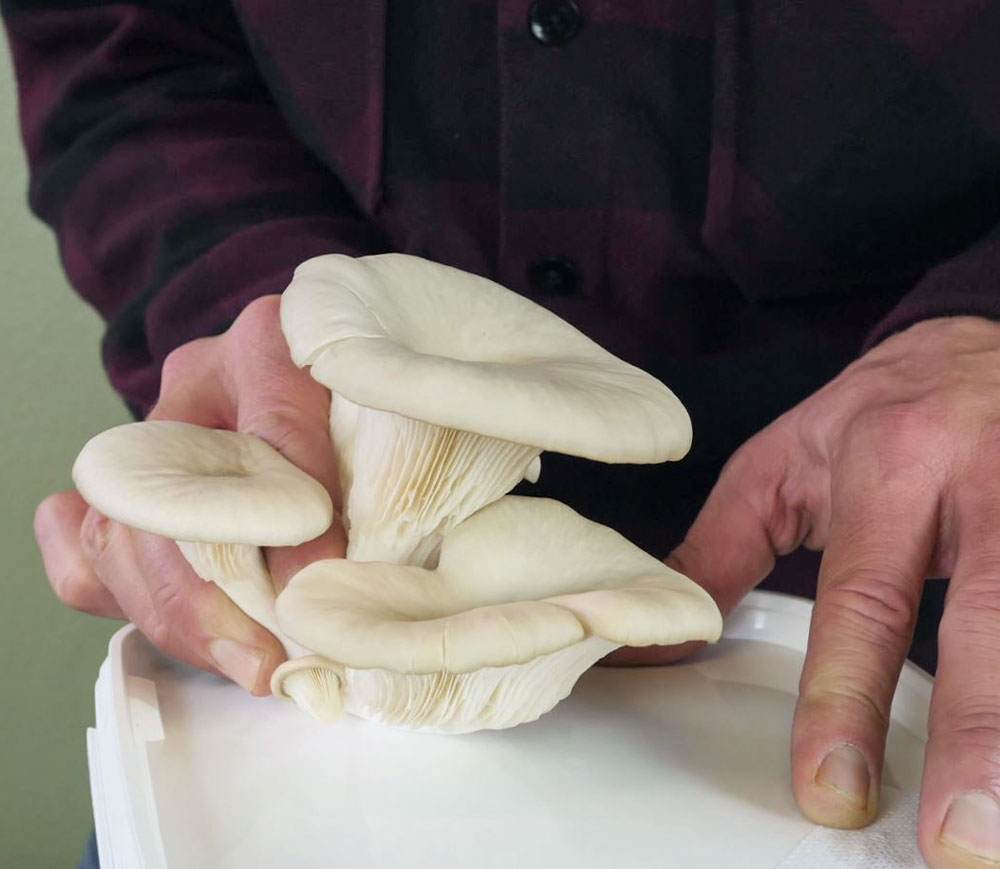
Harvest all the mushrooms in the same cluster at once when the edge of the first cap starts to open horizontally, or no later than 7 days after you notice the first small mushrooms. Grab the base of the cluster, twist and pull it away by hand. Do not harvest the mushrooms by cutting them because the remaining stubs may start going bad inside the Growbag. Cut off the substrate from the harvested mushrooms and compost it or dispose of it with biowaste.
The Growbag may give another harvest if you wait for another 2-8 weeks. Maintaining moisture is very important at this stage, it is highly recommended to continue to use the humidity tent.

Make use of the mycelium
Try other methods to grow mushrooms!
You can use your newly grown block of mycelium to start a Growkit with used coffee grounds or to make a small mushroom bed or mushroom totem in your garden. It is also very suitable as a weed suppressing mulch for your plants. If you have any green mold growing in the substrate, put the moldy areas to the compost or biowaste.